


In the Box
- One black jig body
- One orange slider
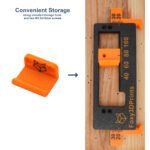
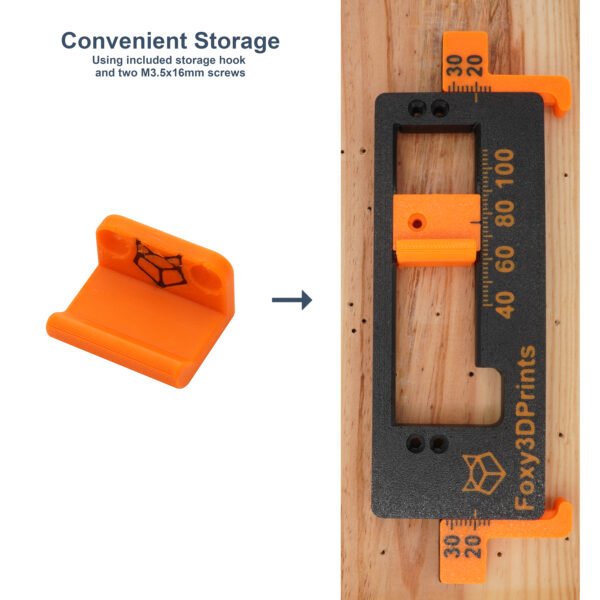
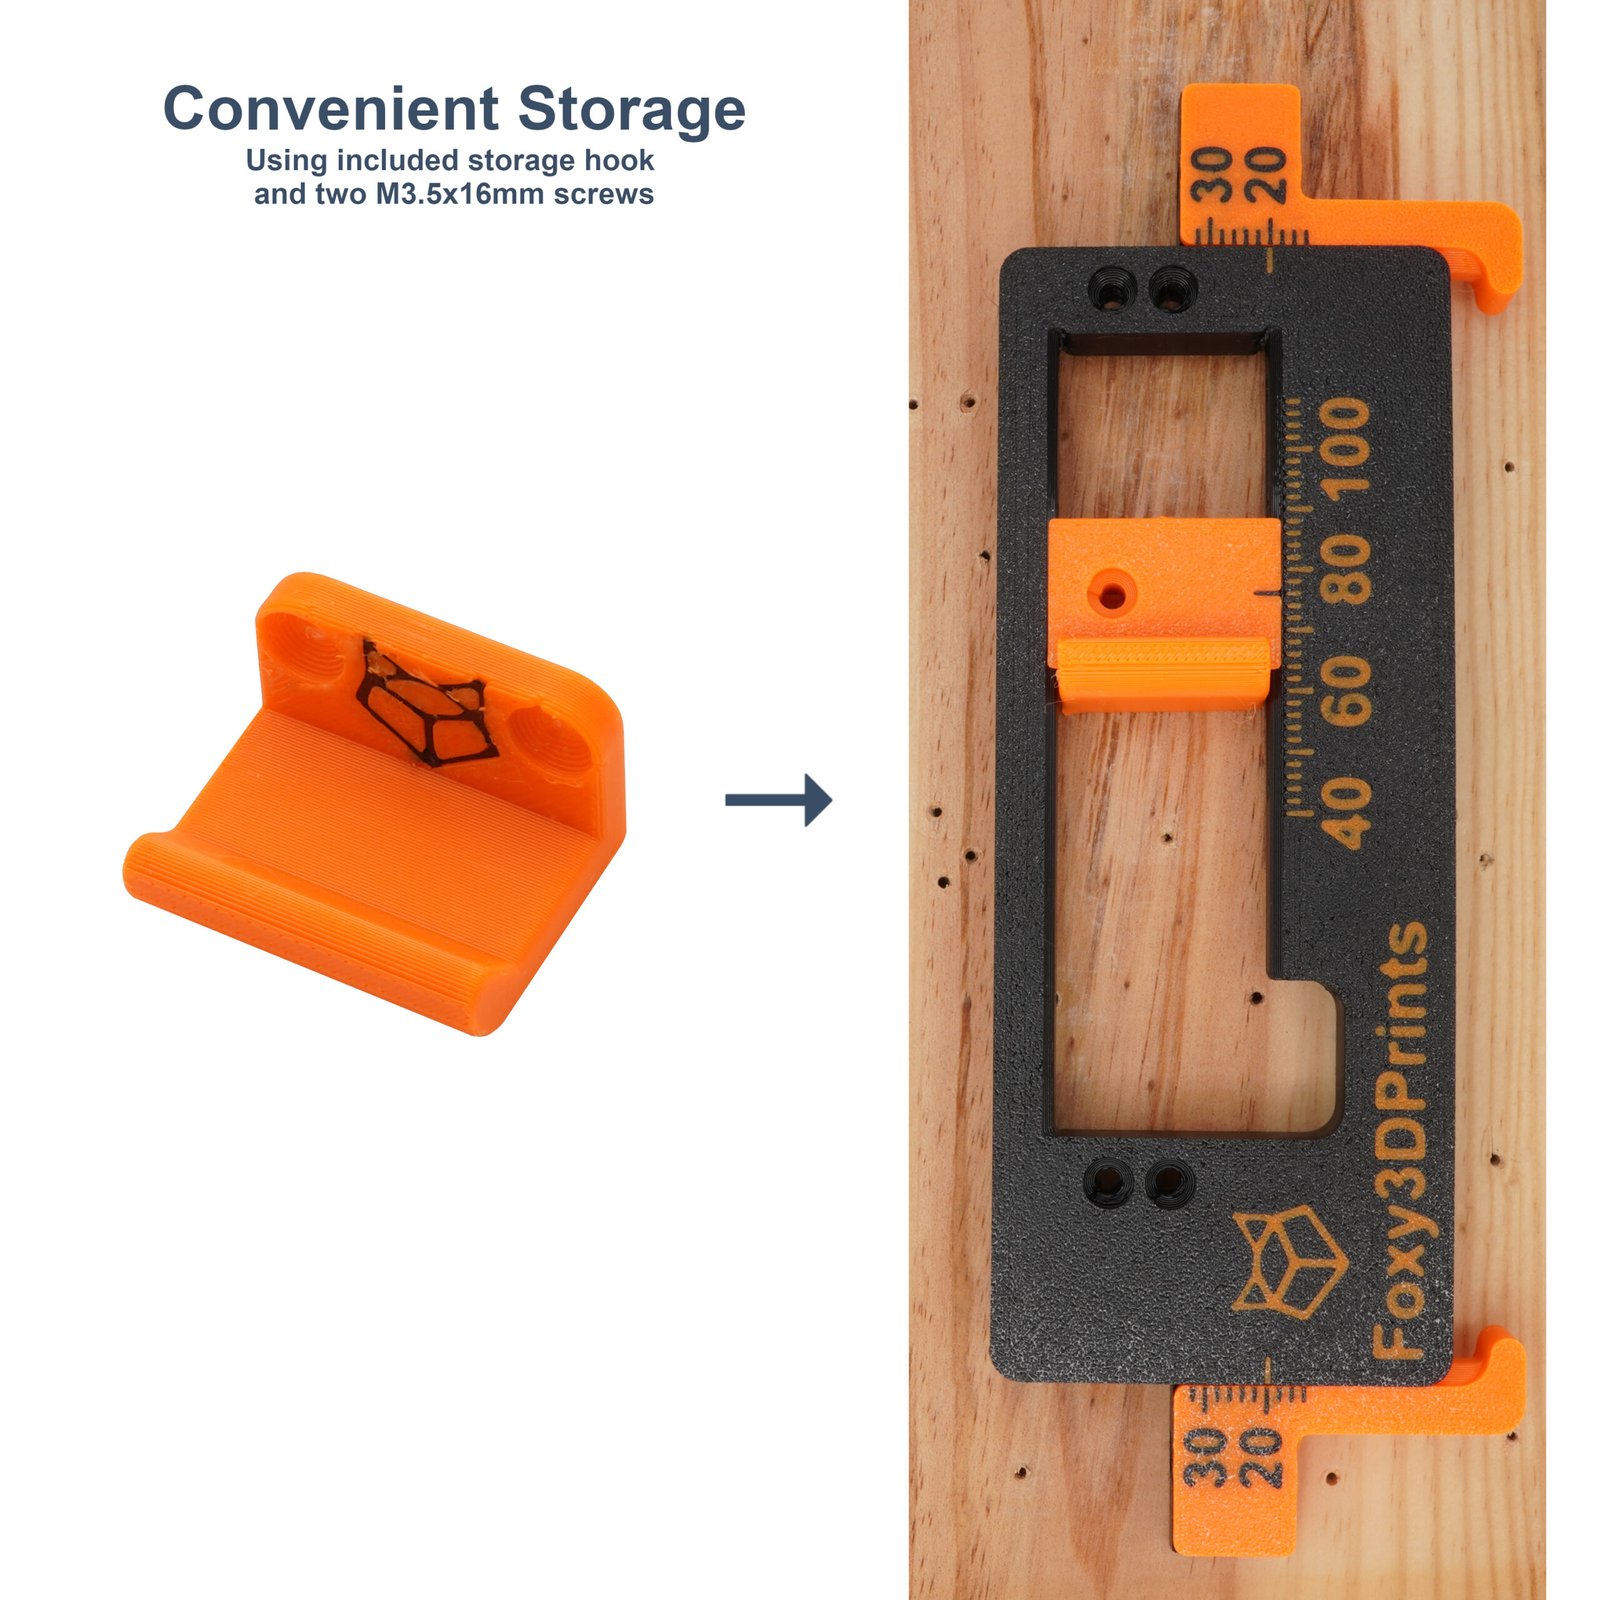
- One orange storage hook
- Two orange fences
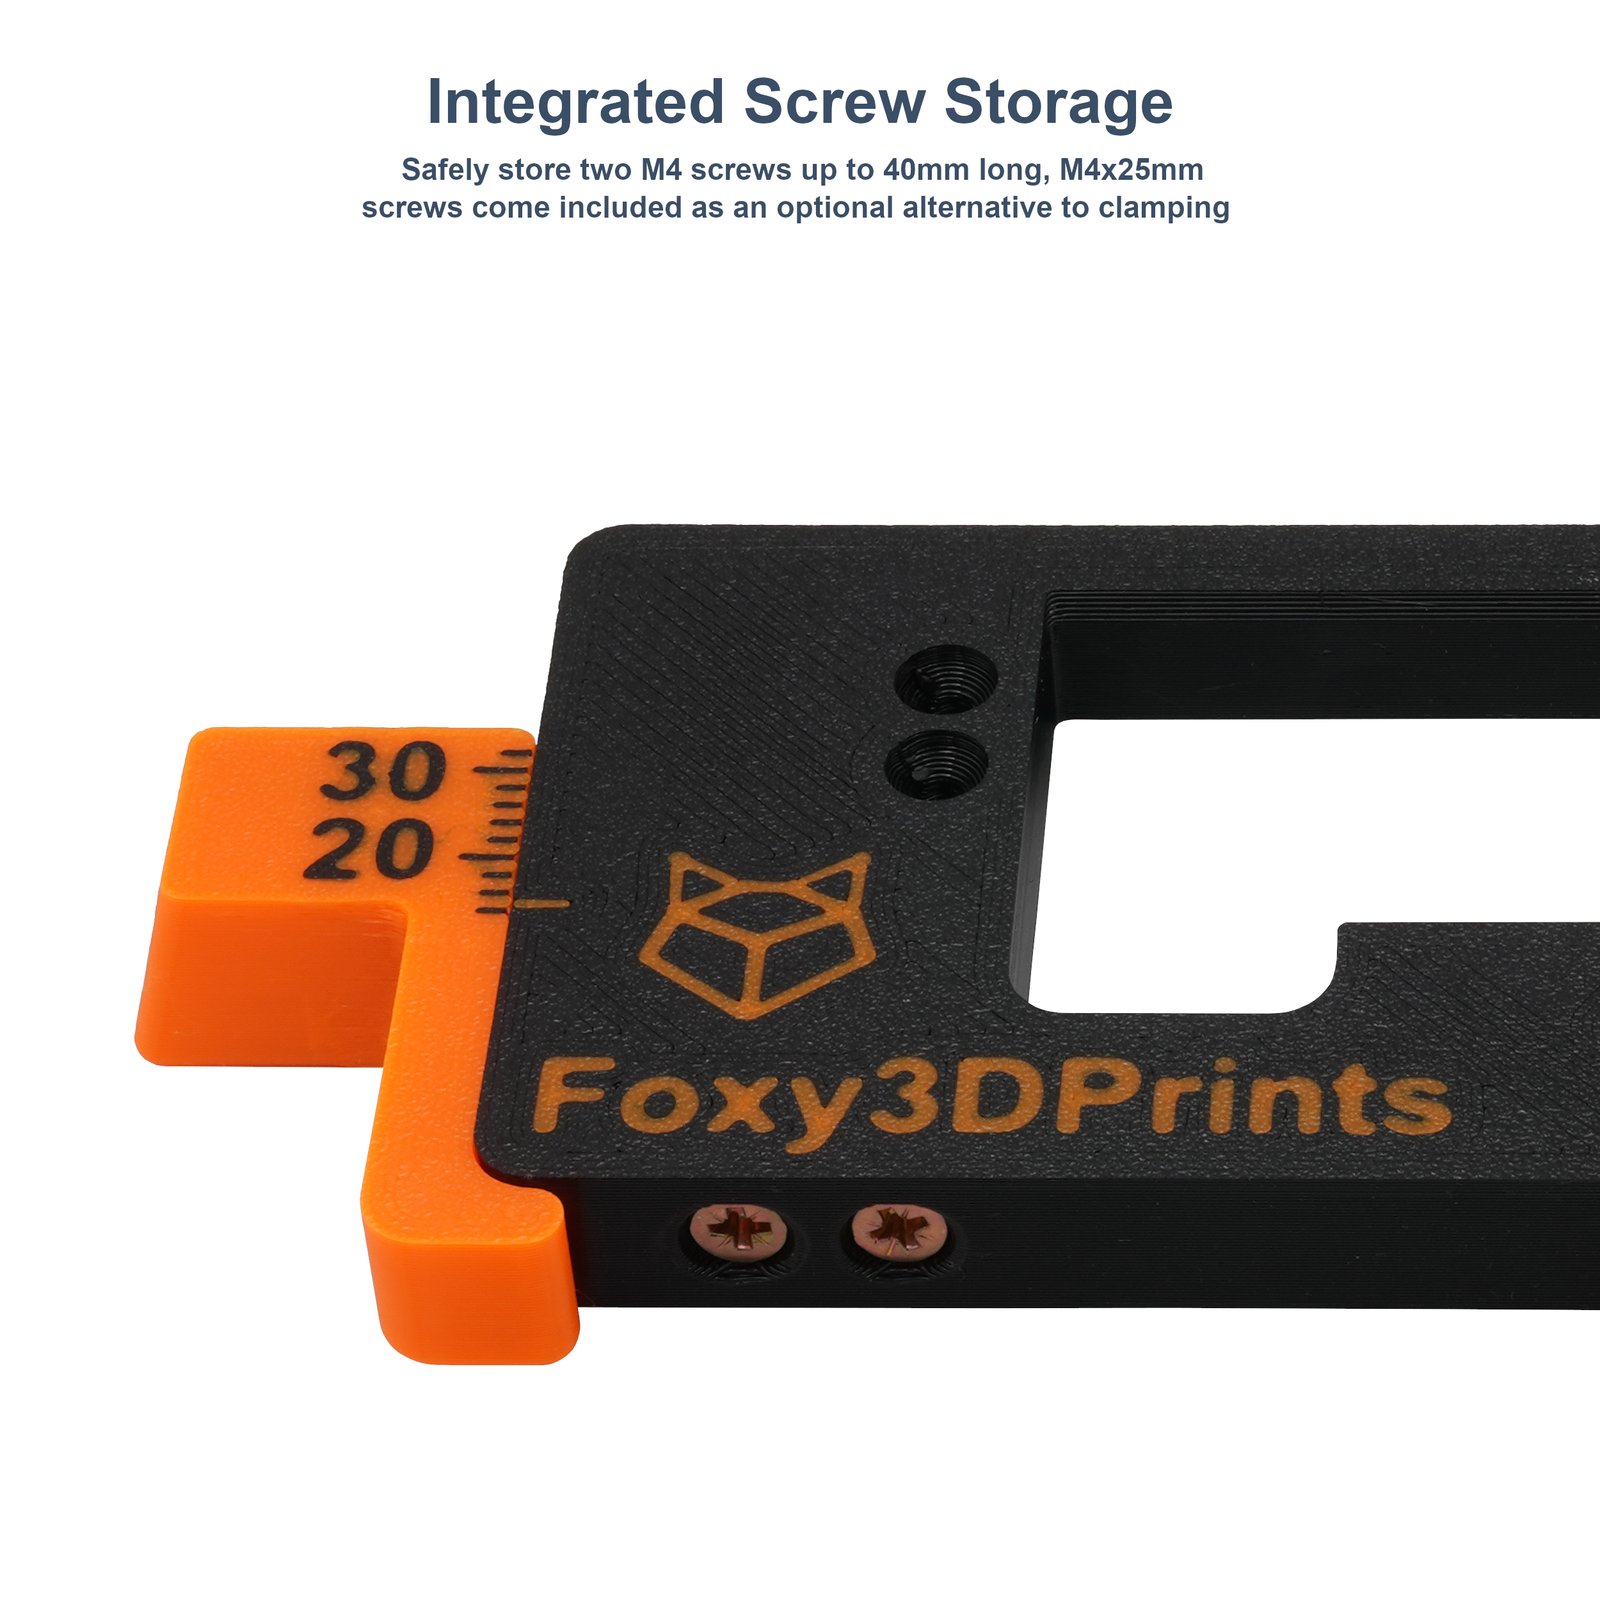
- Two M4x25mm screws stored safely inside the jig for use as a clamping alternative
- Two M3.5x15mm screws for the hook
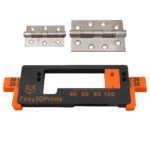
- A2 stainless steel machine bolts to secure sliders in place
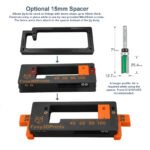
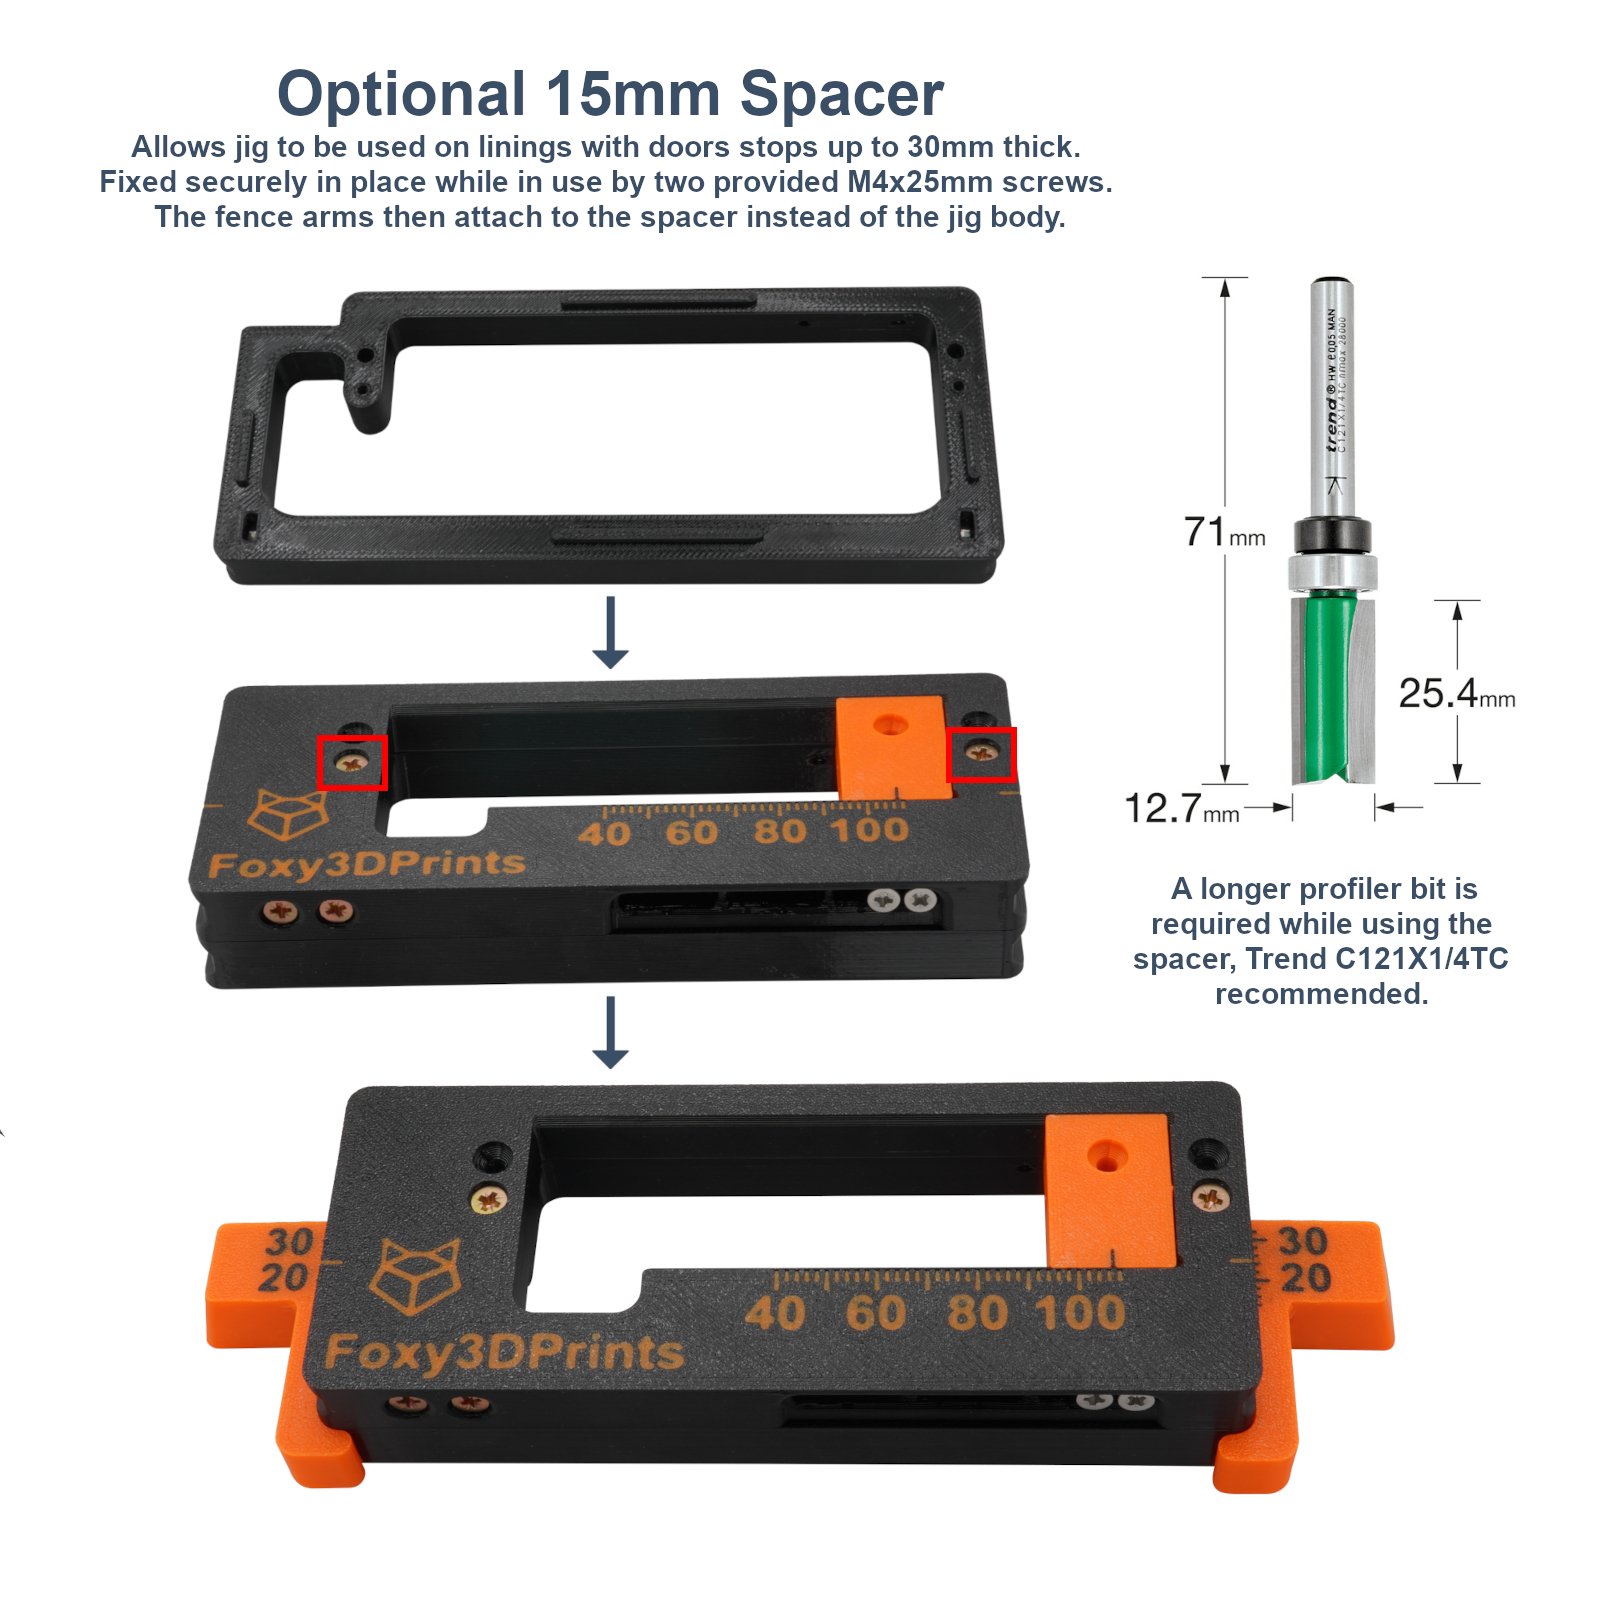
- Optional: one black 15mm spacer to support usage doorstops up to 30mm thick
Options
Package
- 15mm Spacer Upgrade Only – Includes the spacer only, providing a way to use a previously purchased adjustable hinge jig on door linings with doorstops up to 30mm thick.
- Body Replacement Only – Includes the main jig body + slider assembly, providing a cheaper alternative to buying a whole new jig in the case of accidental damage during use.
- Adjustable Hinge Jig – Includes the full kit as described in the “In the Box” section above except without the optional spacer.
- Adjustable Hinge Jig + 15mm Spacer – Includes the full kit as described in the “In the Box” section above with the optional spacer as well.
Jig Usage
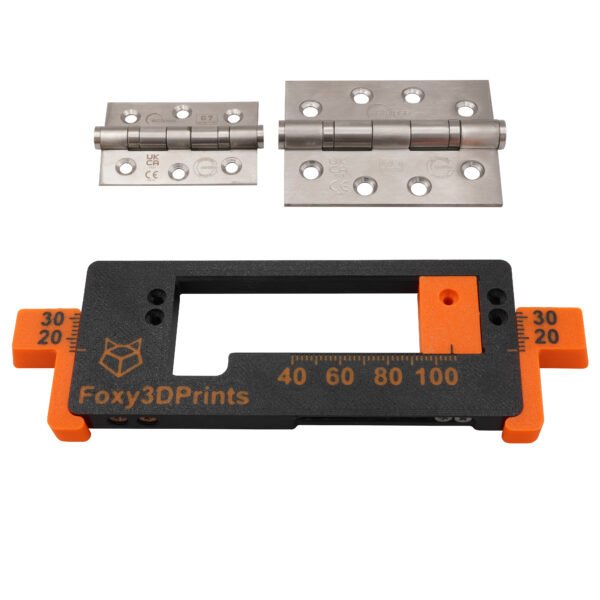
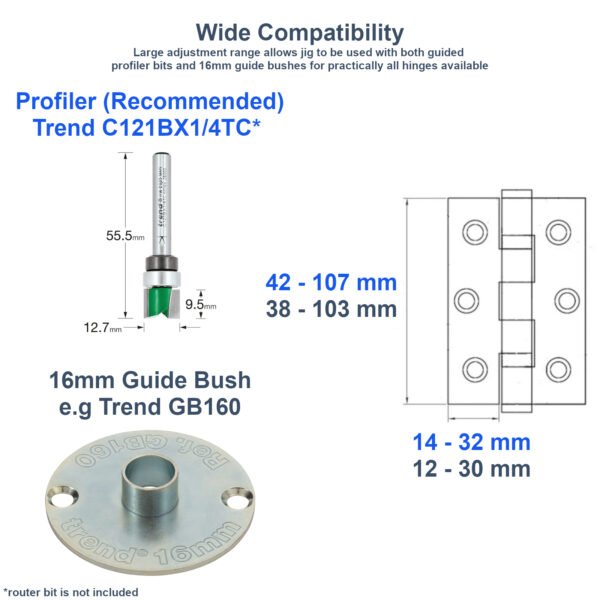
Designed to be used with a guided template profiler router bit up to 15mm in diameter. This sort of bit has a bearing that allows the blade to run around the guide without cutting it. I recommend the Trend 1/4″ 12.7mm x 9.5mm C121BX1/4TC (Toolstation code 441051) as shown in pictures. The router bit is not included.
- MANUAL SCREWDRIVER STRONGLY RECOMMENDED FOR FOLLOWING STEPS
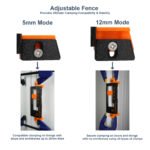
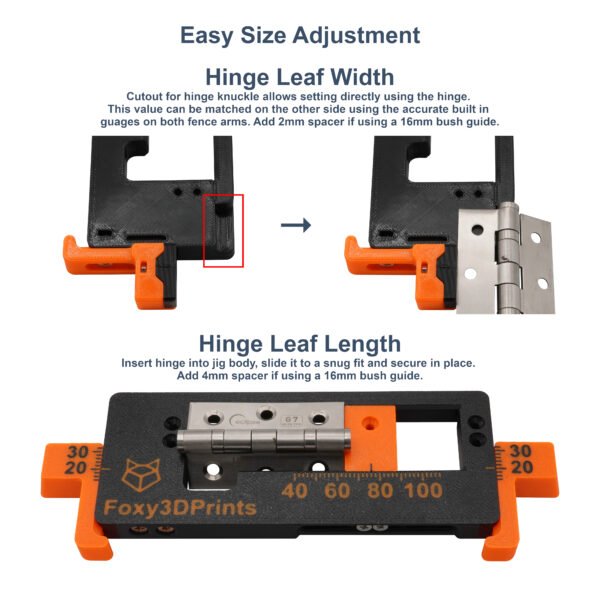
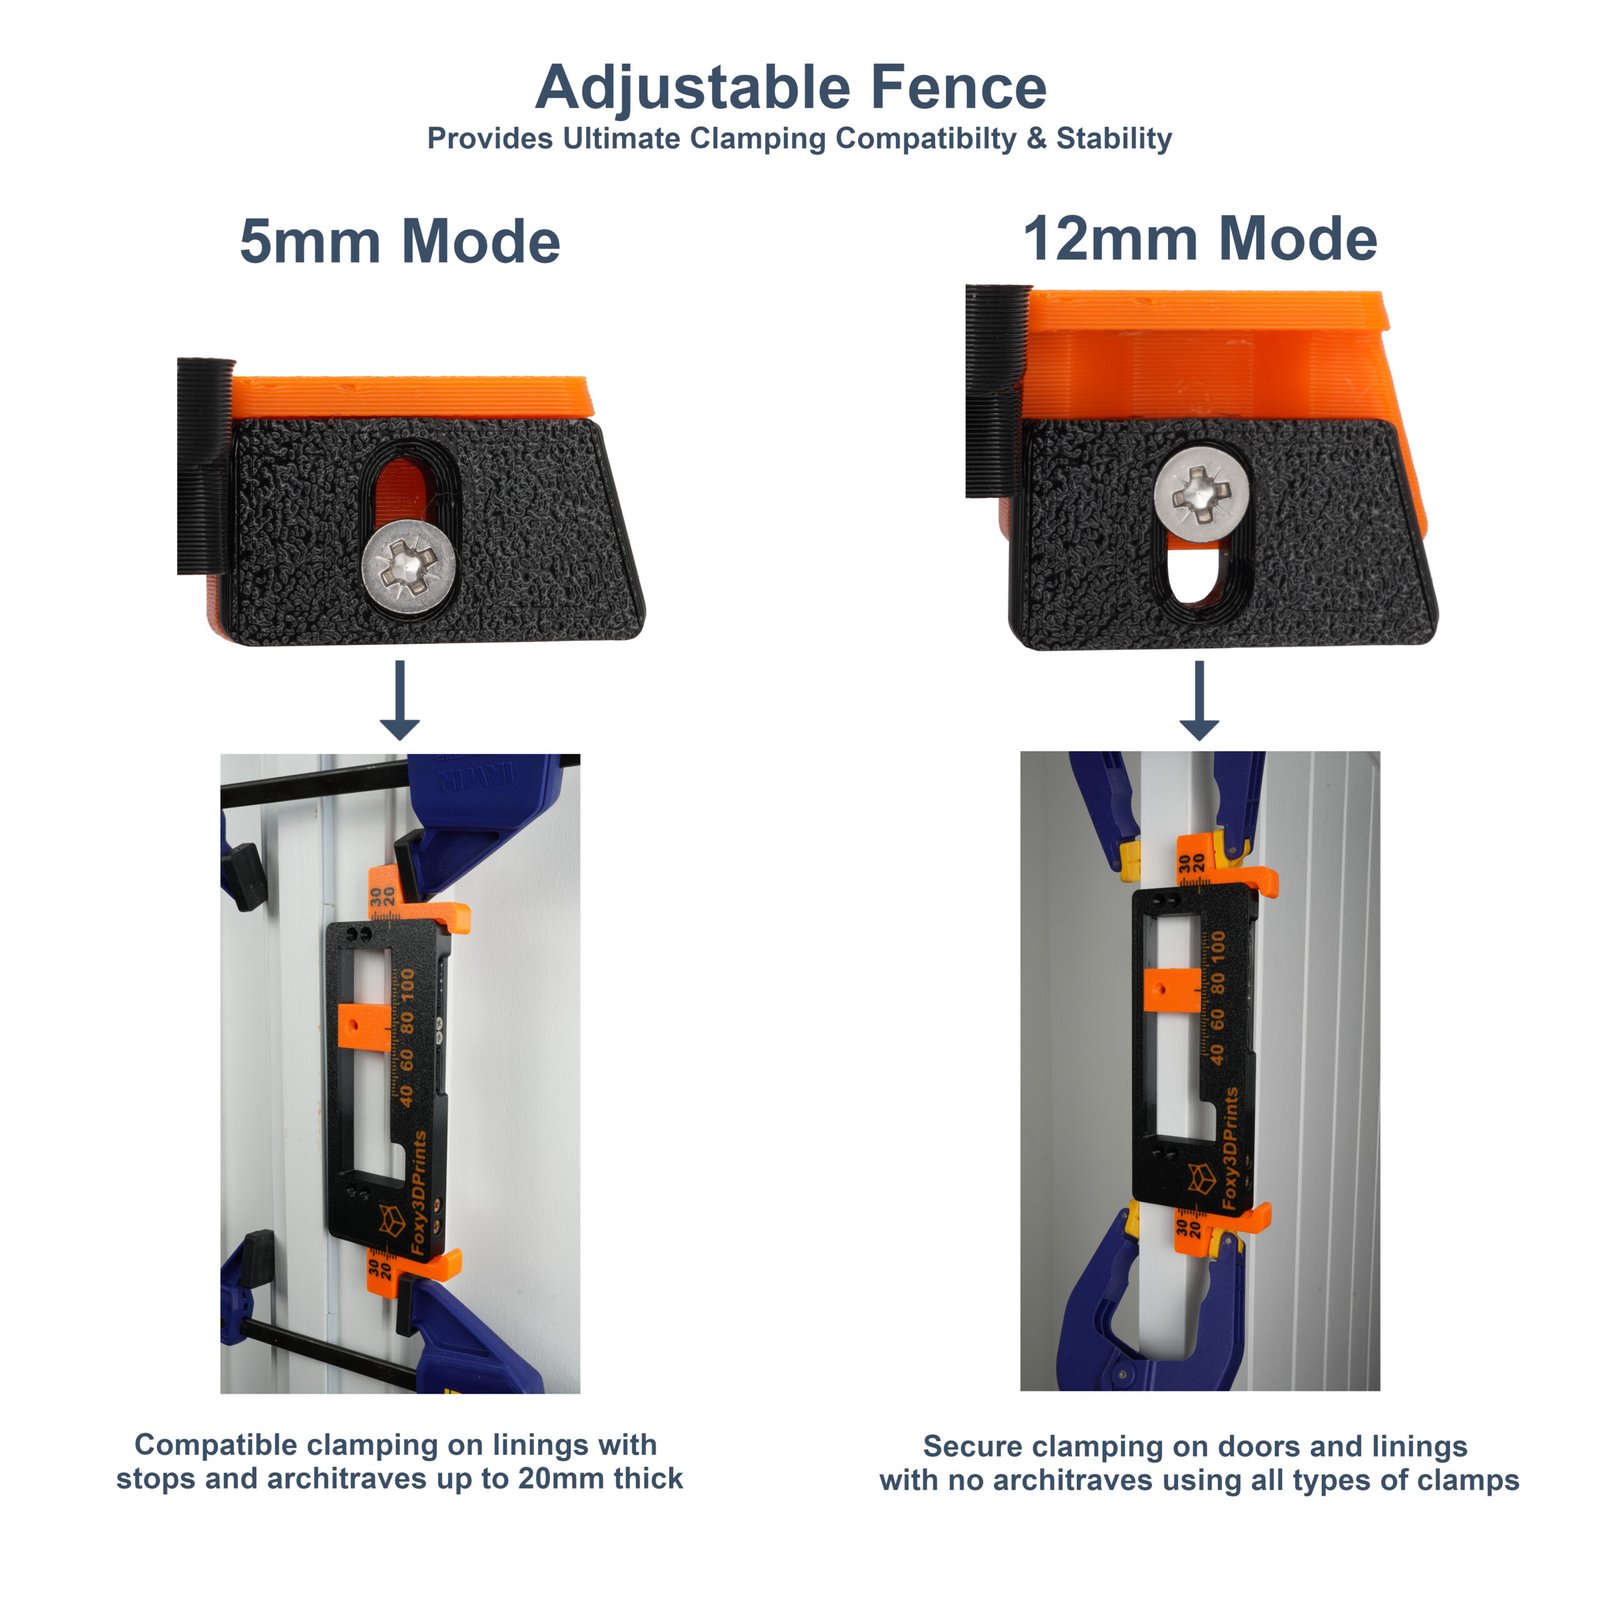
- Loosen the machine bolts on both orange fence arms.
- Slider each one in turn to the required adjustment and tighten them back up (add 2mm spacer if using a 16mm bush guide)
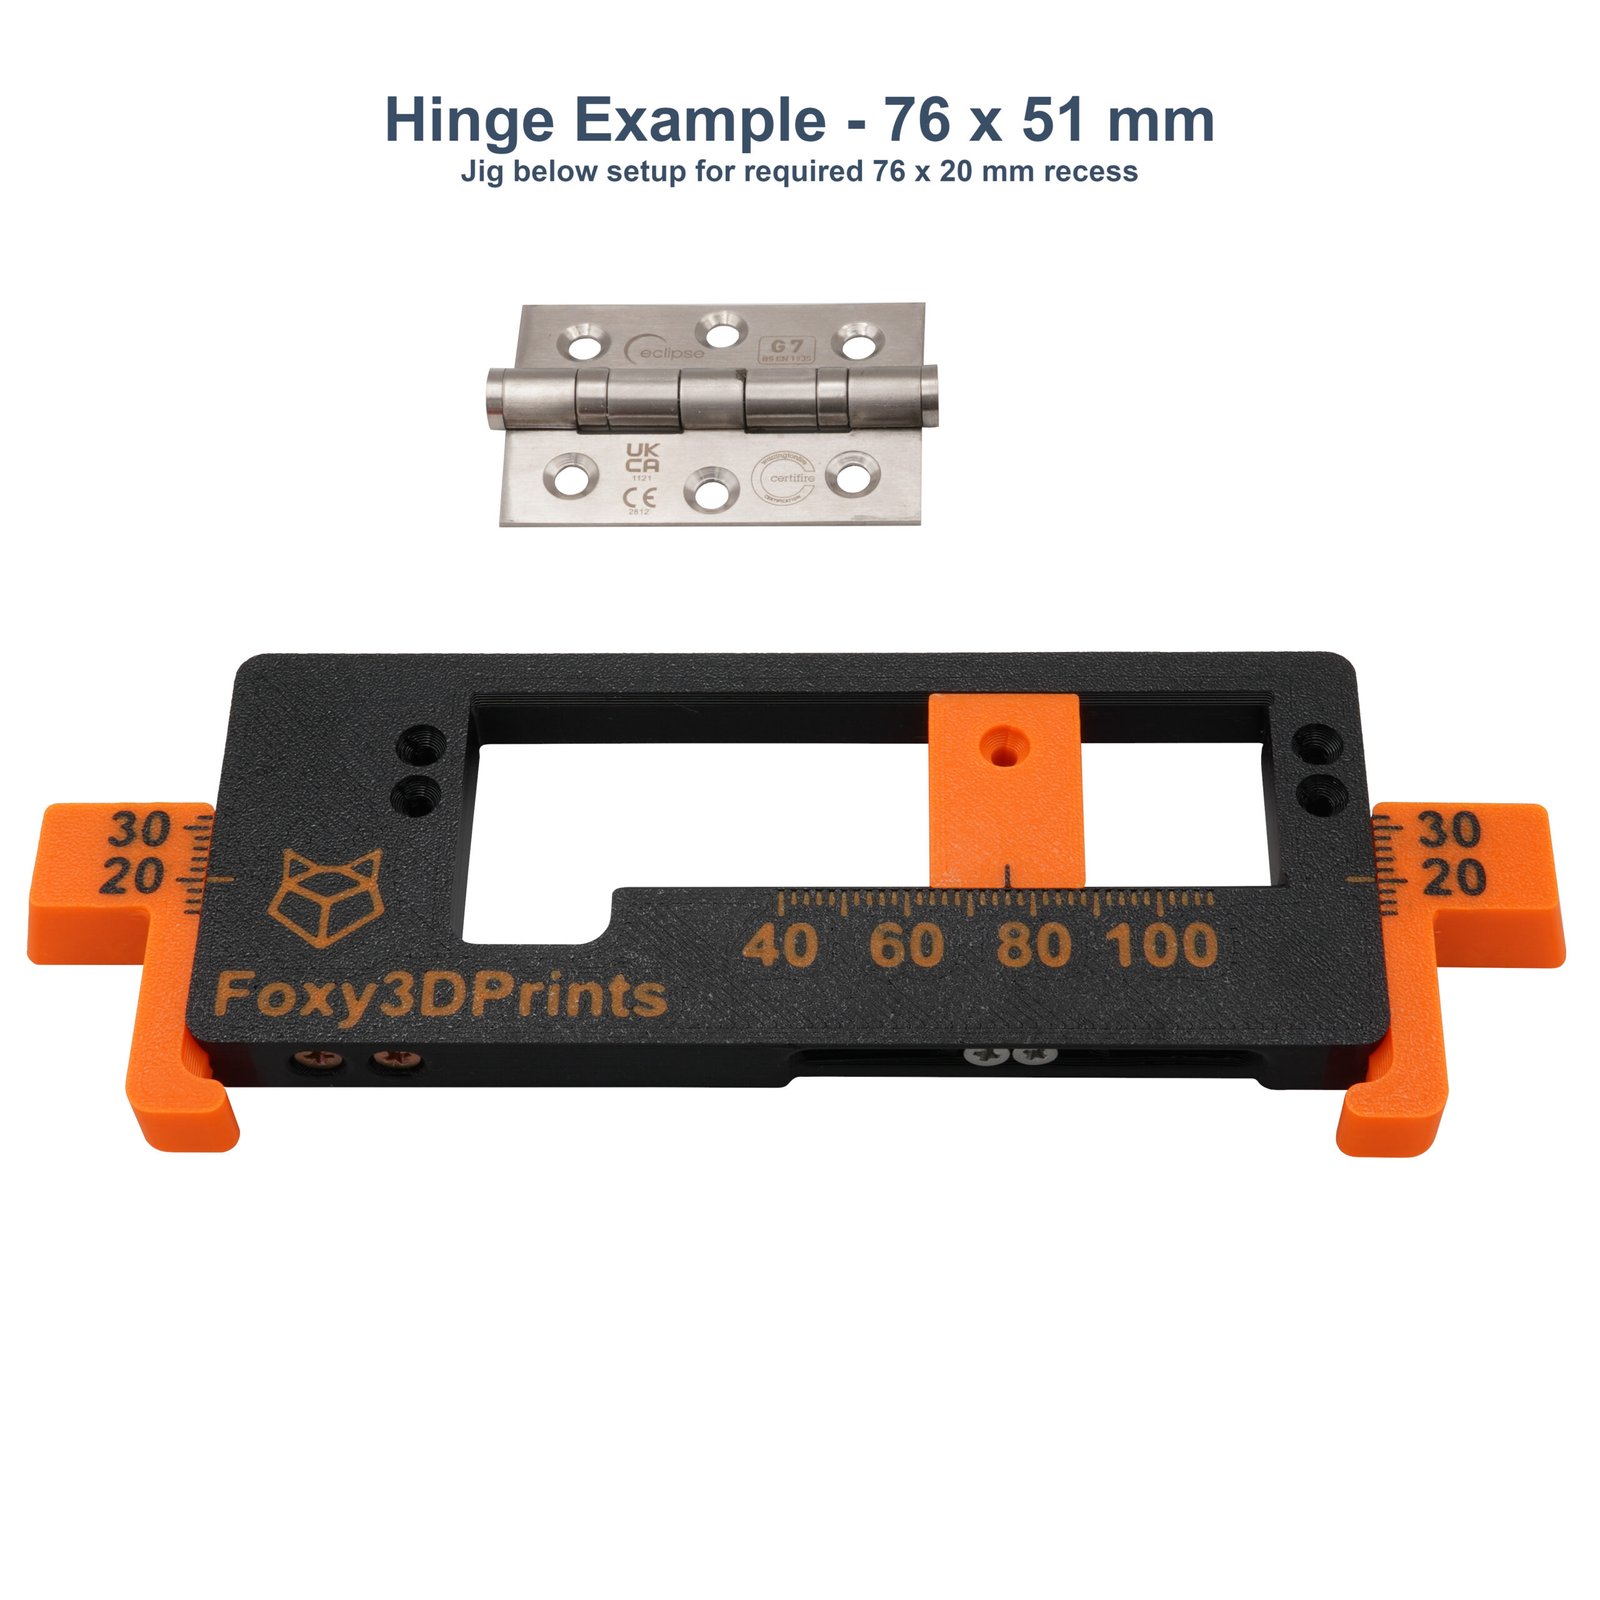
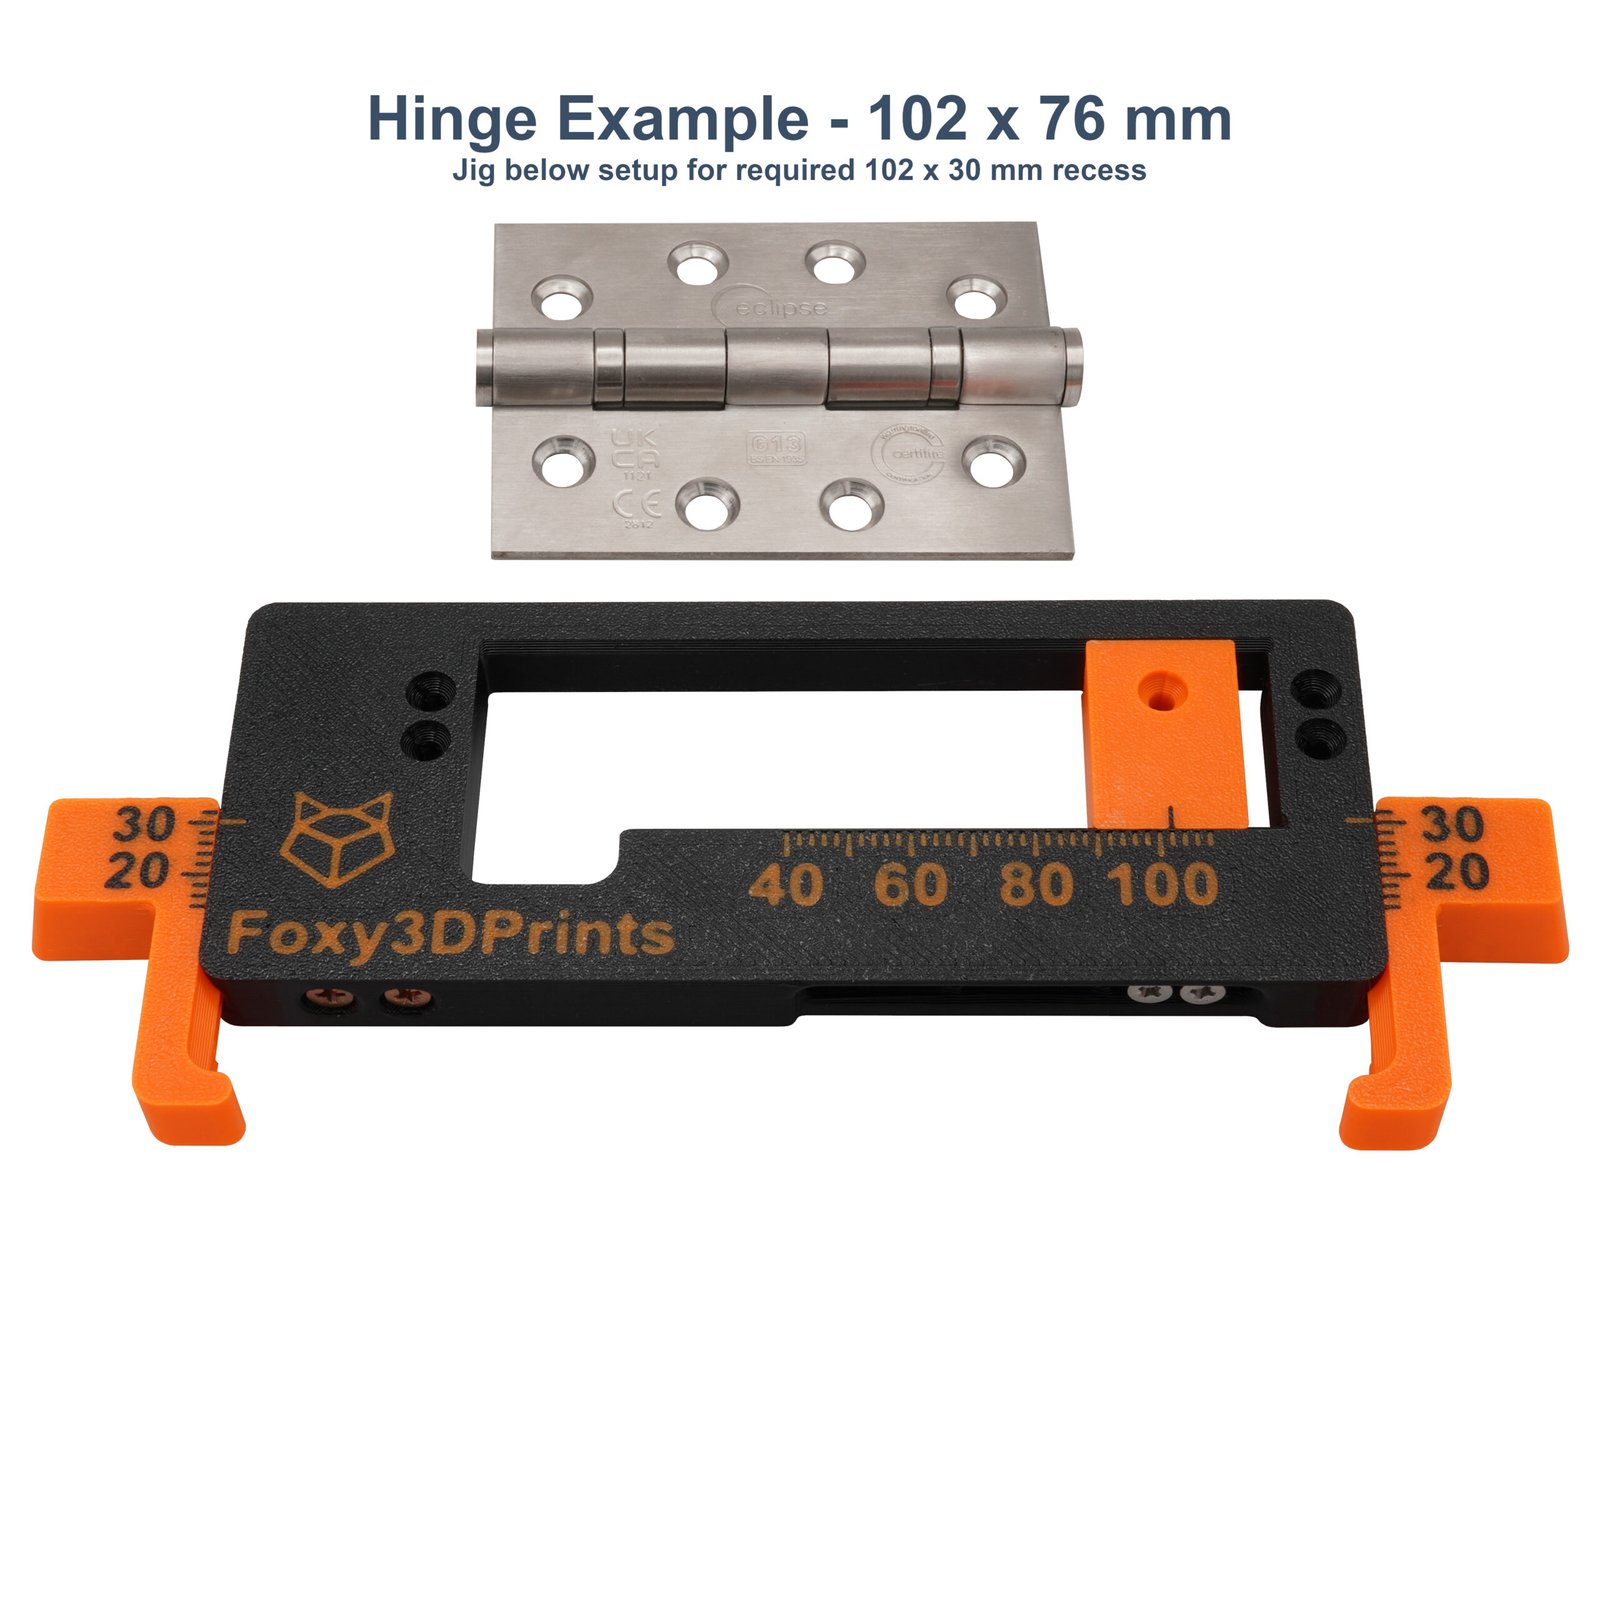
- The hinge knuckle can be put on the cut-out on the back of the jig to set one of the arms directly using the hinge.
- Loosen the slider bolts (or remove completely for big adjustments), then move the slider to the correct location for your hinge (you can insert your hinge as a guide, add 4mm spacer if using a 16mm bush).
- Tighten the two bolts back up to fix the slider in place. Note: In some positions, you may only be able to get 1 bolt in, this is not an issue and will hold fine, just be careful not to lose the other bolt while in use!
- The jig can now be clamped in place and is ready to use.
Once the recess size has been set, secure the jig on your door or door frame in the correct location. Position the router carefully within the jig before switching it on. Once the cut has been made, ensure the router has fully stopped before removing it from the jig. These steps will help prevent accidental damage to the jig.
I recommend you trial the above steps on a spare piece of wood first to make sure you have setup the jig correctly for your hinge before making any cuts on the door/lining.


Rhys –
Great product, designed very well, Daniel has also helped to make some custom jigs for certain products I use.
Thanks